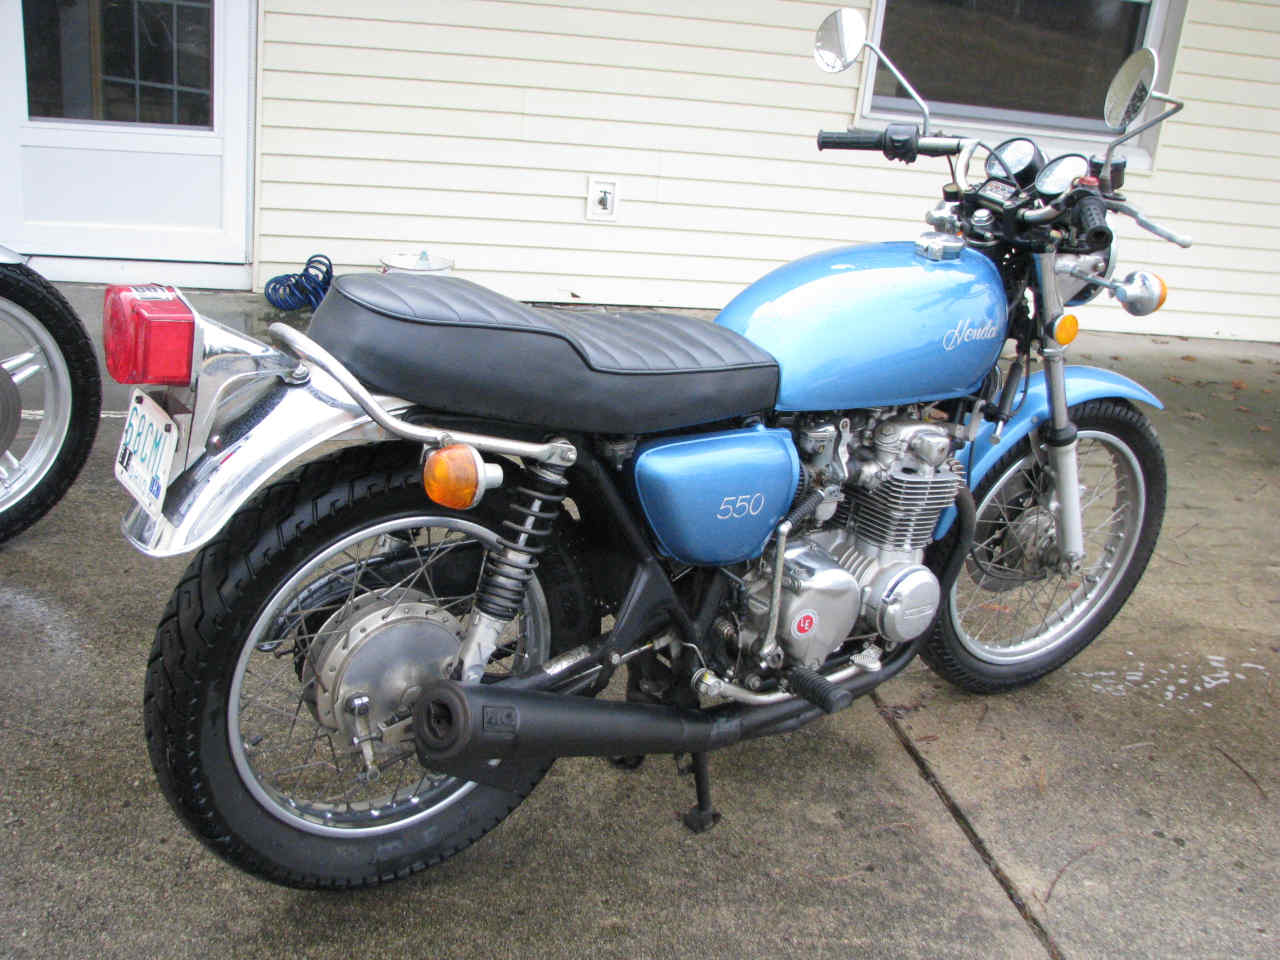
🏍️ Reviving a Classic: Getting the 1974 Honda CB550 Back on the Road
In late February 2017, it was finally time to reawaken my CB550. My immediate goal was not a full, frame-off restoration, but a critical, essential revival: Achieving basic running condition for a reliable road test and further evaluation. This mission was defined by four non-negotiable tasks: power, lubrication, clean fuel delivery, and stopping power.
🛠️ Phase 1: The Essential Revival
The mechanical resurrection began by addressing the most fundamental failures caused by three decades of rest. Had I known back in 1988 that the bike would not be ridden for many years, I would have put it into storage properly.
1. New Power Source & Lubrication
After 29 years, the electrical and lubrication systems were completely compromised.
- The Battery: The original power source was dead. I installed a fresh, lead acid battery I picked up at Rural King, essential for starting and consistent ignition performance in these classic SOHC fours. A quick check of the main fuse and electrical connections prevented any immediate shorts.
- The Oil Change: The old petroleum oil had long lost its protective qualities and was drained out—it resembled thick, black molasses. We replaced the internal oil filter and refilled the engine with 10W-40 motorcycle oil, the appropriate viscosity for the air-cooled engine’s clearances.
Tip: Always cycle the engine a few times before installing the spark plugs to prime the oil passages and confirm the pump is functional. - Cylinder Lubrication: I was lucky in that Dad’s garage is built into the side of a hill and it maintains a somewhat controlled temperature through out the year. A quick check showed that the cylinder walls were not covered in rust, but I still gave each of the 4 cylinders a shot of Marvel Mystery Oil to help free up the piston rings.
2. Fuel Tank Restoration: The Hidden Contaminant
Before tackling the carburetors, I had to address the source of the fuel. Rust from decades of residual moisture was a major concern. The tank was about half full when the bike was parked and what remained was a foul smelling mess.
- The Assessment: Internal corrosion and flaking rust were highly visible. Running the bike with the tank in this state would immediately poison any fresh fuel and clog the newly cleaned jets.
- The Fix: The tank was first thoroughly cleaned to remove loose debris, followed by a rigorous de-rusting process using Evapo-Rust. Once dry, I chose to use the Red-Kote internal fuel tank liner. This involves coating the interior with a two-part polymer, creating a seamless barrier between the steel and the fuel. This time-consuming step ensures the integrity of the fuel from the source forward and protects against today’s ethanol-blended fuels. NOTE: Be carefull not to plug the tank vent in the gas cap as I did!

3. Fueling the Fire: The Carburetor Rebuild
This was, predictably, the largest and most delicate technical challenge. Old fuel had evaporated, leaving behind a gummy varnish that seized components and hardened rubber seals.
- The Process: Each of the four Keihin carbs was disassembled down to the body. A thorough cleaning was performed using a combination of carb cleaner and a careful probing of all the small passages with a single wire pulled from a wire brush to ensure every tiny passage was clear. Unfortunately this was before I purchased an ultrasonic cleaner. All old, hardened rubber components (float bowl gaskets, needle seat O-rings were replaced). If at all possible, I highly recommend using the original brass jets, and needles. Unfortunately I had one pilot jet that was damaged and it was replaced with original quality sourced from PJ Motorsports.
- A Specific Challenge: The Pilot Circuit: If even after the initial cleaning, you find the bike struggled to idle smoothly and consistently on all four cylinders, this is a tell-tale sign of clogged pilot jets and their associated passageways. It often isn’t enough to simply soak them; you may find you need to do like me and use fine strands of wire (pulled from a wire brush) and compressed air to physically clear the micro-orifices. If the pilot circuit is blocked, the engine simply won’t run correctly below 3,000 RPM.
- Reassembly Note: Setting the float heights correctly (usually requiring a 22 \ +- 1 mm measurement for the CB550) was non-negotiable for reliable idle and performance and required careful adjustment after reassembly.
4. Stopping Power: Brake Service
Getting it running is one thing; safely stopping it is another.
- Front Disc: The front hydraulic system was completely refreshed. The caliper was cleaned, new brake pads installed, and the entire system was flushed with new DOT 3/4 fluid. Critically, I fully siphoned and wiped clean the master cylinder reservoir before the flush to ensure no old sludge was pushed down the line. The system was bled until the lever was firm.
- Rear Drum: The rear wheel was removed to inspect the brake shoes. They were found to be in serviceable shape, so the drum was cleaned with emery paper, and the brake actuation cam was lubricated to ensure smooth pedal feel.
🛣️ Phase 2: The Road Test & Evaluation
With the mechanical essentials addressed, the moment of truth arrived. The bike started, ran, and stopped. But reliability is earned, not given. The next crucial step was the 200-Mile Stress Test—an active evaluation to reveal weaknesses that only manifest under real-world riding conditions.
The goal was to test the engine, brakes, and clutch under heat and stress at varying speeds.
Prioritizing Safety: The Critical Weak Link
While the engine ran surprisingly well and the brakes functioned adequately, the road test made one safety item the top priority: The Tires.
Decades-old tires are a major safety hazard, regardless of visible tread depth. The rubber on the bike, dating back to the late 80s, had lost its essential pliability. The polymers were hardened, and the structural integrity was highly suspect due to age and ozone exposure. Riding on them was a minimal-traction gamble, and the risk of a catastrophic blowout was unacceptable.
This realization immediately set the course for Phase 3: the bike was safe for evaluation, but not for sustained riding.
🔩 Phase 3: Putting the Rubber to the Road
The next wave of work focused entirely on the running gear, transforming the bike into a truly safe and reliable machine.
1. The Complete Refresh
I addressed all three components critical to safe travel on a spoked wheel:
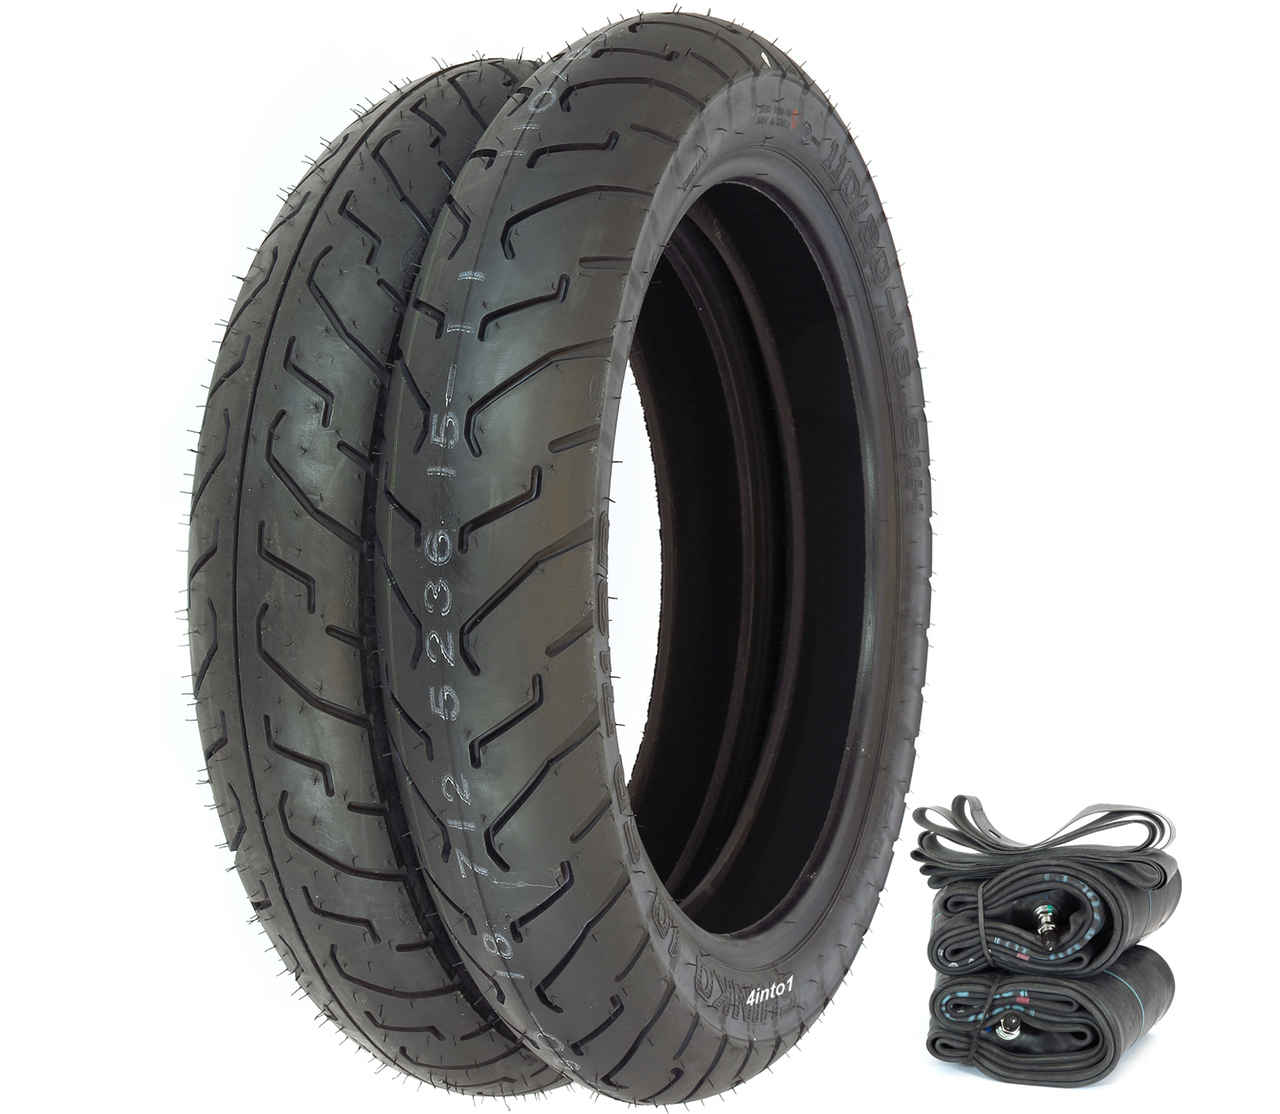
- New Tires: I opted for Shinko 712 front & rear. These are modern designed bias-ply tires. They provide the correct profile for the chassis while offering vastly superior grip and structural stability compared to the old rubber.
- New Tubes: New inner tubes were an absolute necessity. Old tubes stretch, thin out, and become compromised over time.
- New Rim Strips: This is a vital, often-overlooked detail. New rim strips were installed to cover the spoke nipples inside the rim. If the old strips fail, the sharp edges of the nipples will chafe and puncture a new tube almost instantly.
2. The Installation Process
The wheels were removed, cleaned thoroughly, and the new components installed using soapy water as lubricants and non-marring levers. Finally, both wheels were statically balanced. Unbalanced tires cause distracting vibration, stress the wheel components, and negatively impact handling.
With fresh rubber beneath it, the 1974 CB550 was finally ready to be ridden not just as a mechanical experiment, but as a safe, roadworthy motorcycle capable of being relied upon. You can typically buy the tools you need to do this work yourself for about the same money a local shop will charge you. If you plan to do tire work in the future, this can save you money down the road.
🏁 Conclusion: The Road Ahead
The journey from a dust-covered relic unintentionally stored since 1988 to a truly roadworthy machine took critical, focused effort starting in 2017. The project is a testament to the enduring quality of Honda engineering and the satisfying process of bringing a vintage motorbike back to life.
In the span of a few focused weeks, we eliminated the major barriers to operation: securing a clean fuel supply via the Red-Koted tank, restoring smooth function with rebuilt carbs, ensuring safety with a brake service, and finally, guaranteeing stability with new tires, tubes, and strips.
While the CB550 is currently a safe and reliable rider, the process is not truly finished. As I used to race this bike, I’m planning to restore the proper gearing, go back to the factory air box and filter, and I’m sure some other items will pop up as well.